How to import your GA-TaxPro Desktop data to GA-TaxPro Cloud
Use this guide to move clients and returns from the GA-TaxPro Desktop Windows app into GA-TaxPro Cloud.
The import is self-service. You export a data folder from Desktop, upload the .dbf files in Cloud, choose which clients to bring over, and review the results.
Step 1 — Export data from Desktop
On the Windows PC that runs GA-TaxPro Desktop:
Open the Desktop app.
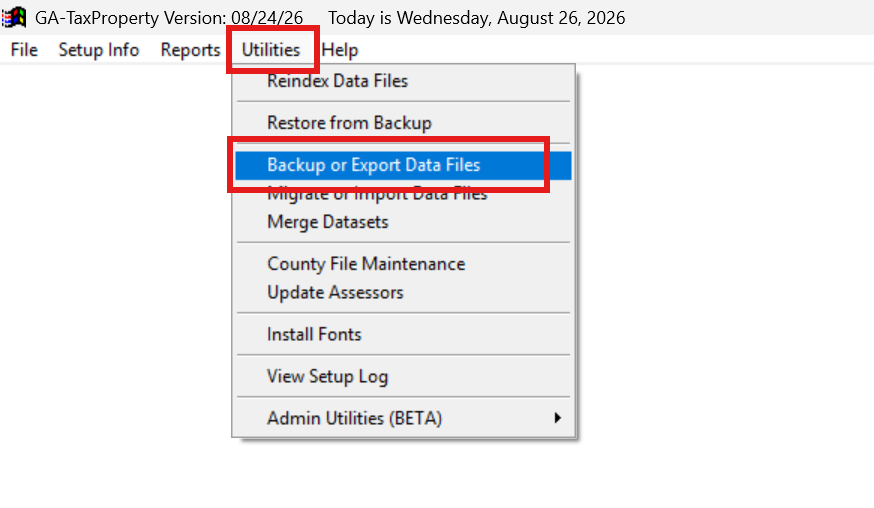
Open the Utilities menu.
Click Backup or Export Data Files.
Click OK to continue.
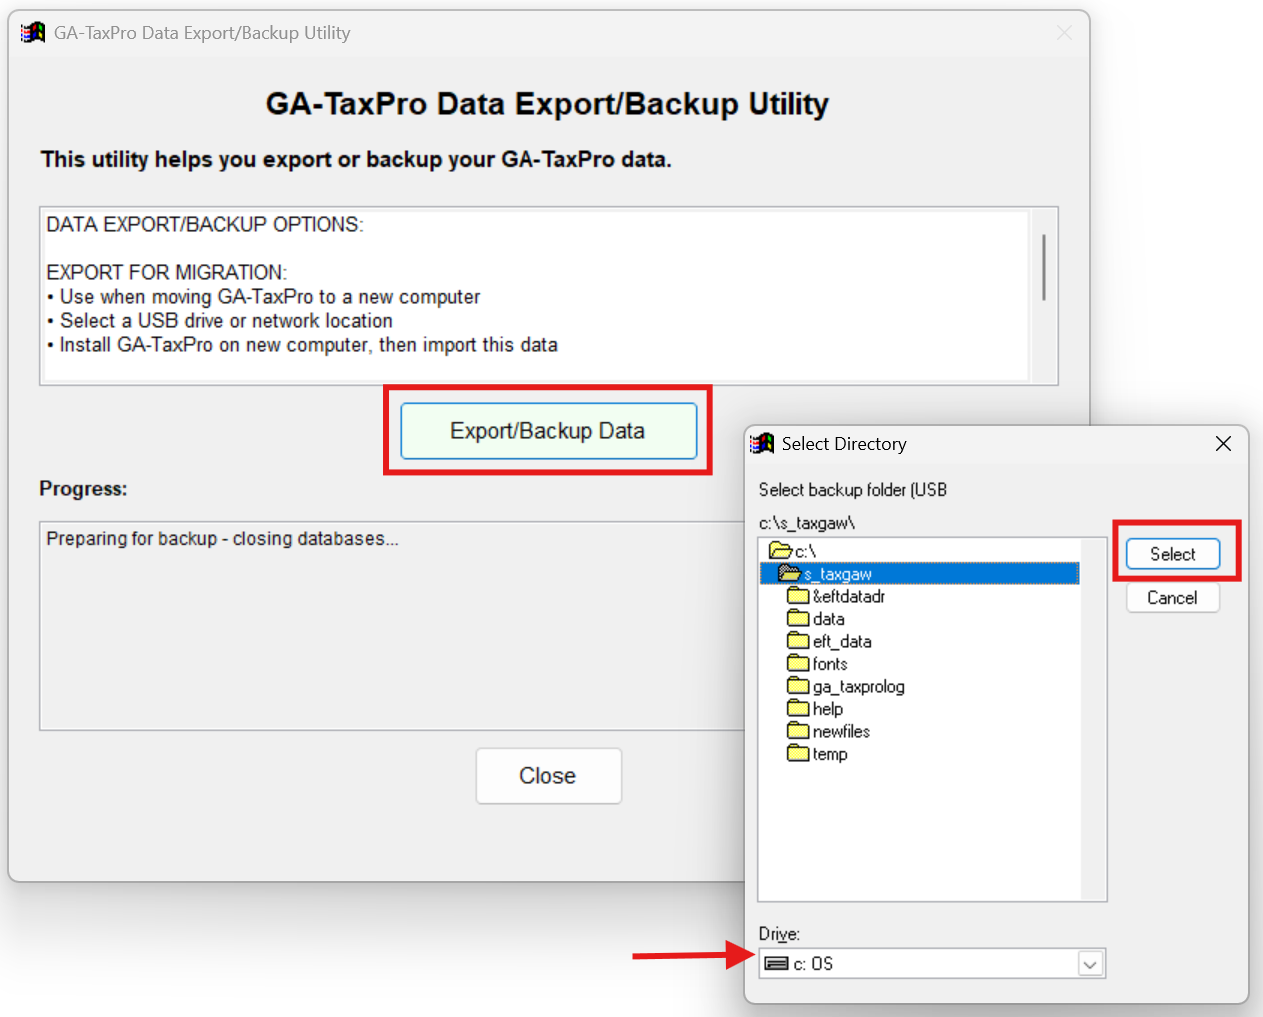
Choose where to save the exported data folder.
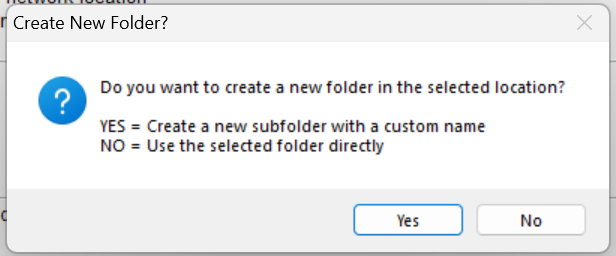
When asked to create a subfolder, click Yes, name the folder, then click OK.
You should now have a folder full of .dbf files (for example ptcust01.dbf, buhead00.dbf).
Leave this folder where you can find it. You will upload from it in the next step.
Step 2 — Open the import wizard in Cloud
Sign in to GA-TaxPro Cloud.
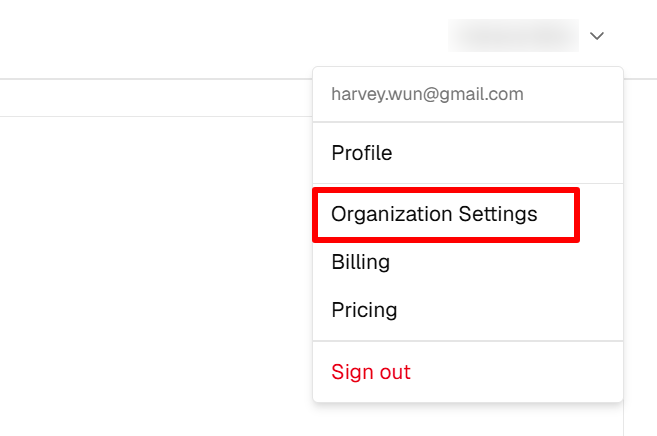
Open the user menu (your email, top right).
Click Organization Settings.
Scroll to Import Data.
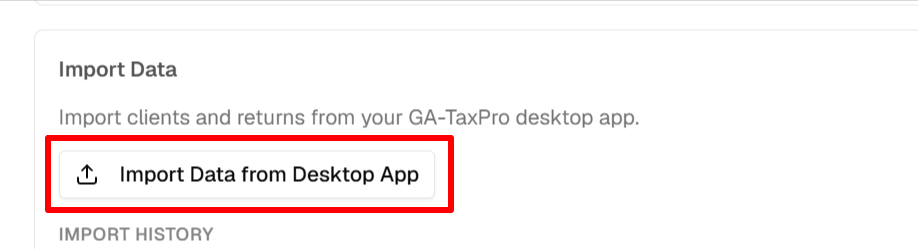
Click Import Data from Desktop App.
The wizard opens as a full page with three steps: Upload Files → Select Clients → Import.
Step 3 — Upload the Desktop files
On Step 1 of 3: Upload Desktop App Files:
Click Select Files (the recommended button).
Browse to the exported data folder from Step 1.
Press Ctrl+A to select all
.dbffiles, then click Open.
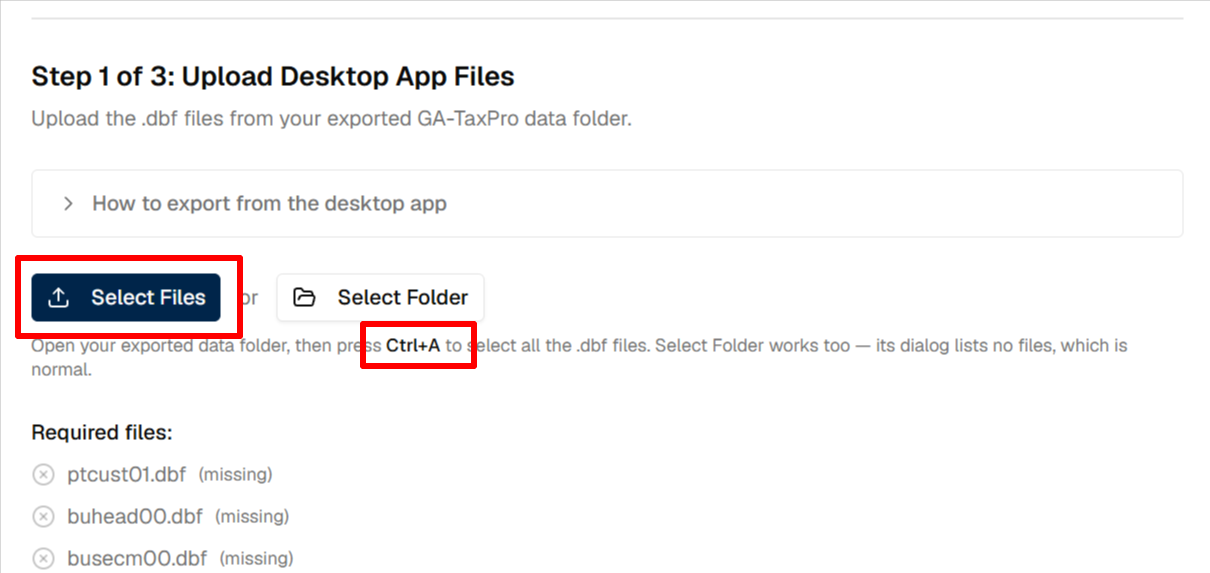
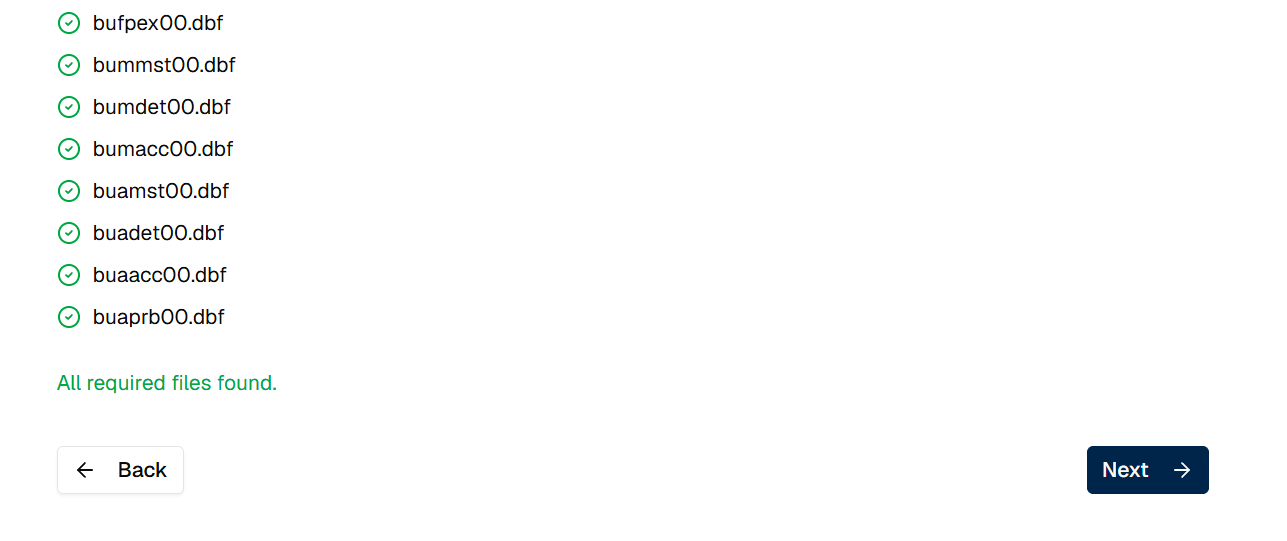
The wizard shows a checklist of the 23 required files. Each file turns green when it is found.
Note: Select Folder also works, but its dialog lists folders only — not the .dbf files. An empty-looking window that says “No items match your search” is normal. Choose the export folder itself and continue.
When the page says All required files found, click Next. Cloud reads the files (this can take a moment on a large firm).
Step 4 — Choose which clients to import
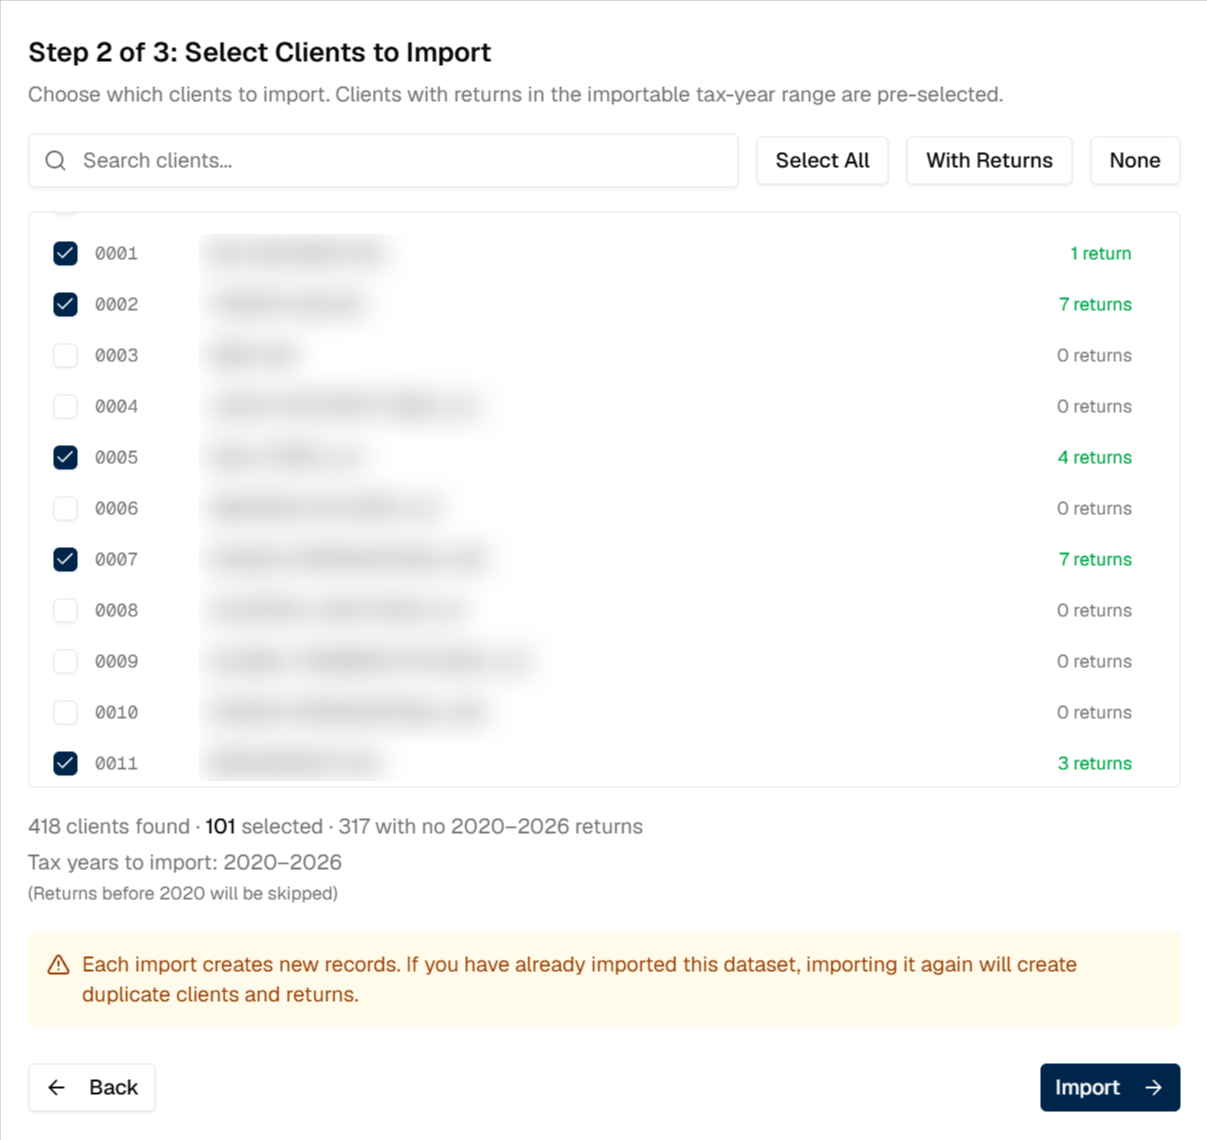
On Step 2 of 3: Select Clients to Import, Cloud lists every client from Desktop.
Clients that have returns in 2020–2026 are already checked.
Clients with 0 returns in that range are listed but unchecked. You can still check them if you want the client record in Cloud for later.
When the selection looks right, click Import.
We recommend only importing clients with returns.
Step 5 — Review the results
On Step 3 of 3: Import Results, Cloud shows progress, then a count of what was created, plus any errors. Expand the error list to see which rows were skipped and why.
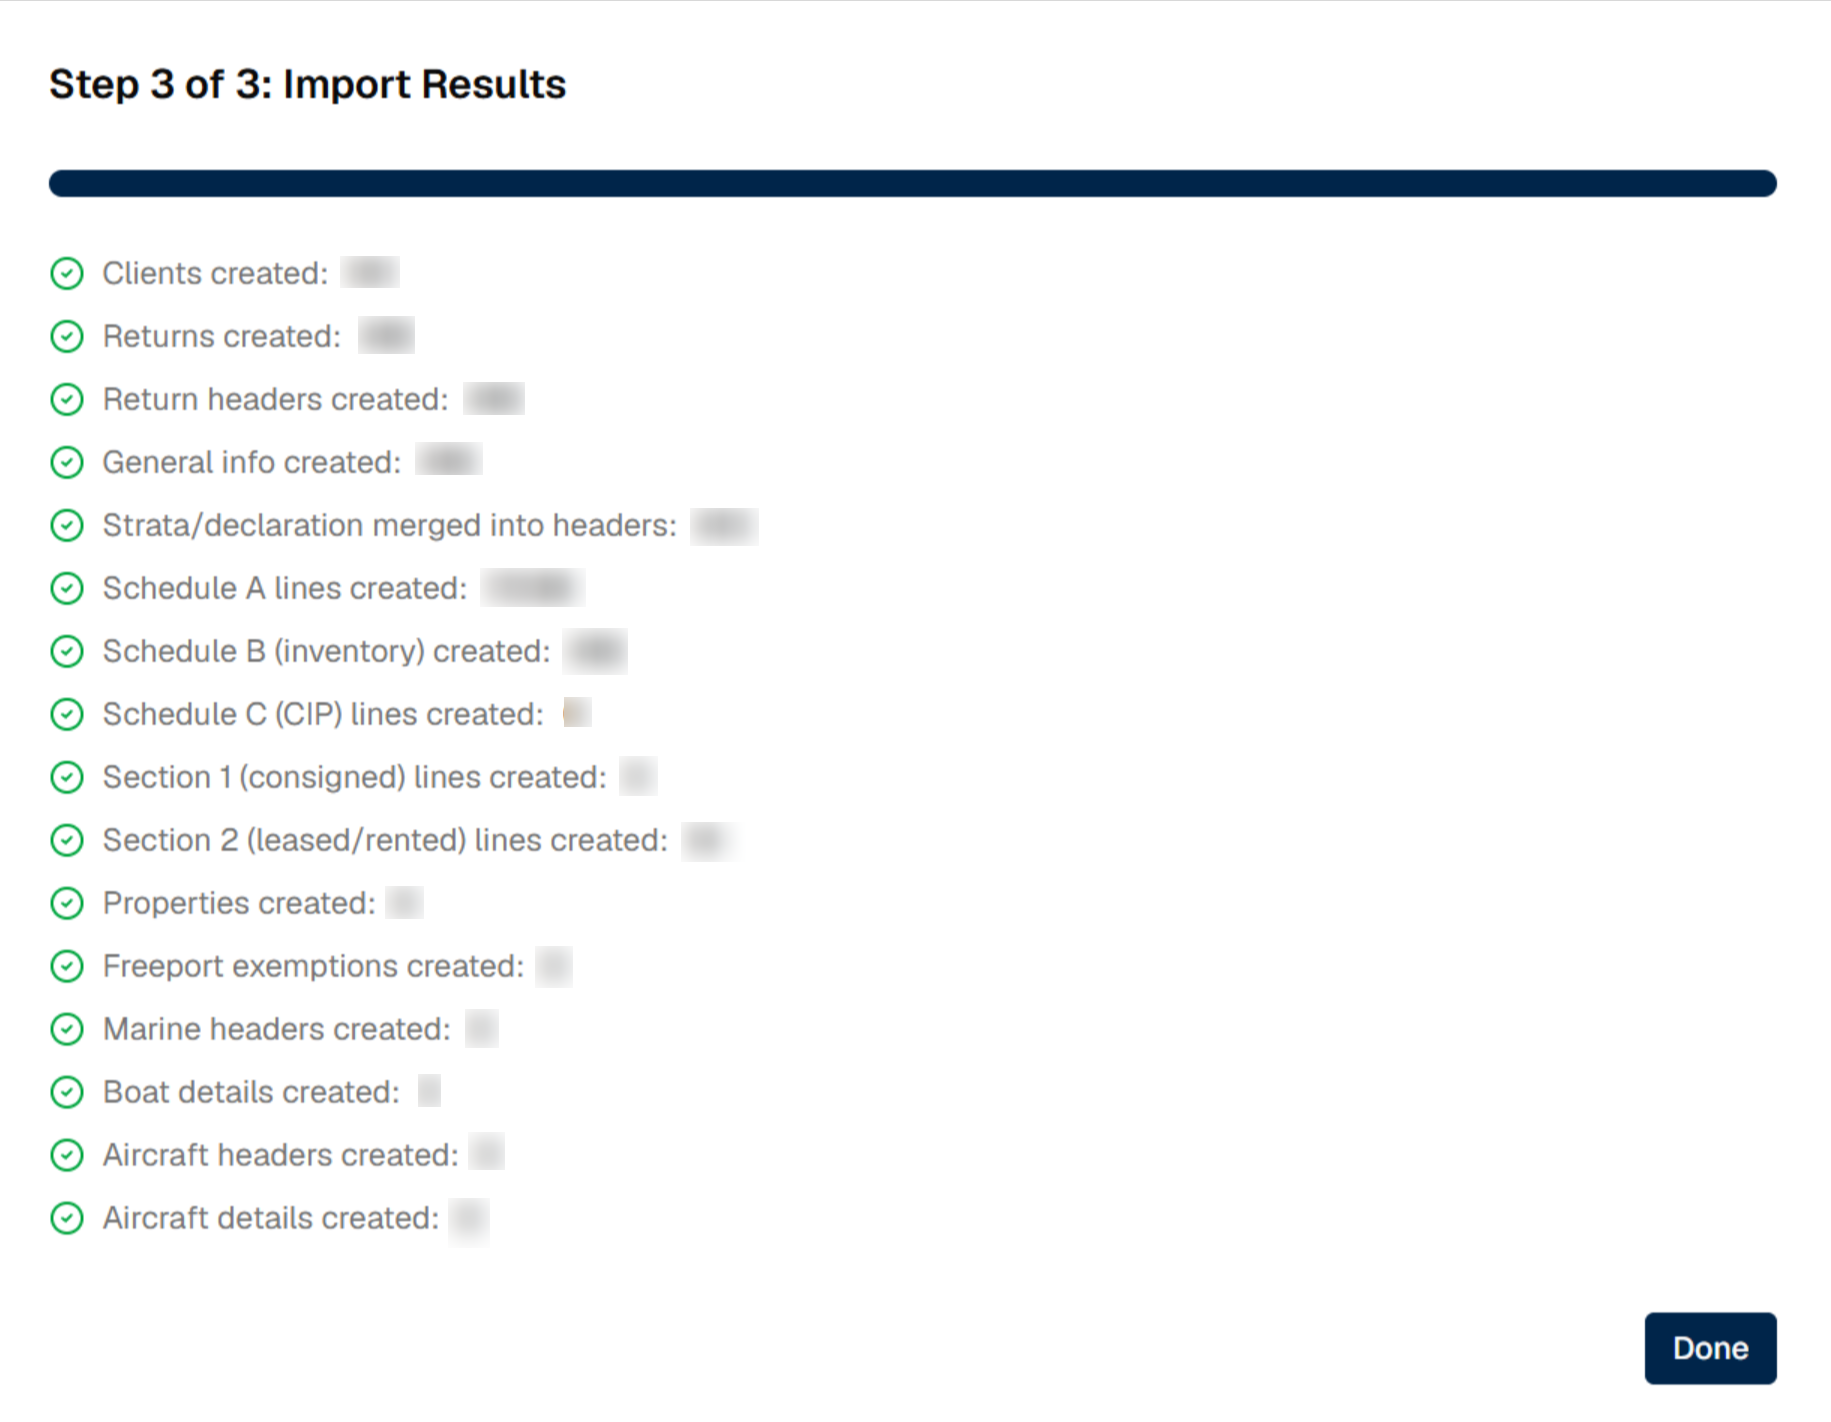
Click Done to return to the dashboard and open a few clients to spot-check names, counties, and recent returns.
After import
Spot-check the work. Open several clients and compare a recent return in Cloud to the same return in Desktop — Page 1, Schedule A, and property list are the fastest checks.
Do not re-import to “refresh” data. A second import of the same files adds a second copy. To replace a bad import, undo it first, then import again.