Lesson 1: Adding a new client
In this tutorial, we will guide you through the process of adding a new client to your GA-Taxpro software. Follow these simple steps to get started:
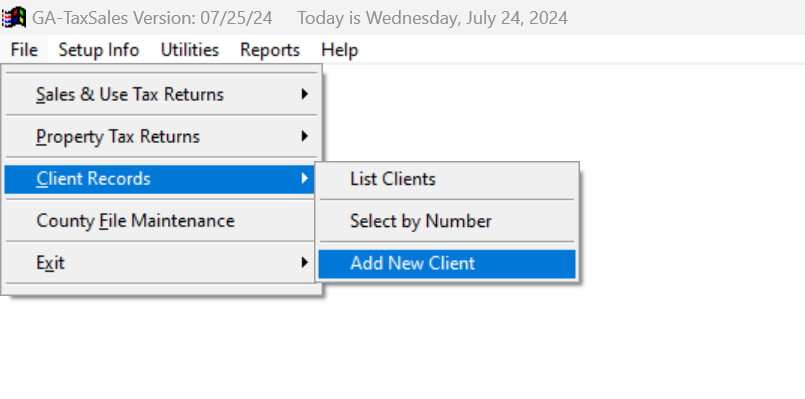
Step 1: Navigate to File > Client Records in the main menu. Click on the "Add New Client" button.
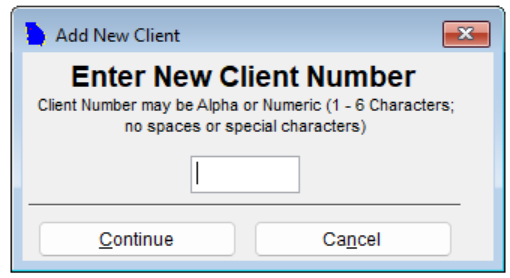
Step 2: Create a new client number. This number must be between 1-6 alphanumeric characters. We recommend using the first few letters of your client's name for easy identification. Once you have entered the client number, click "Continue."
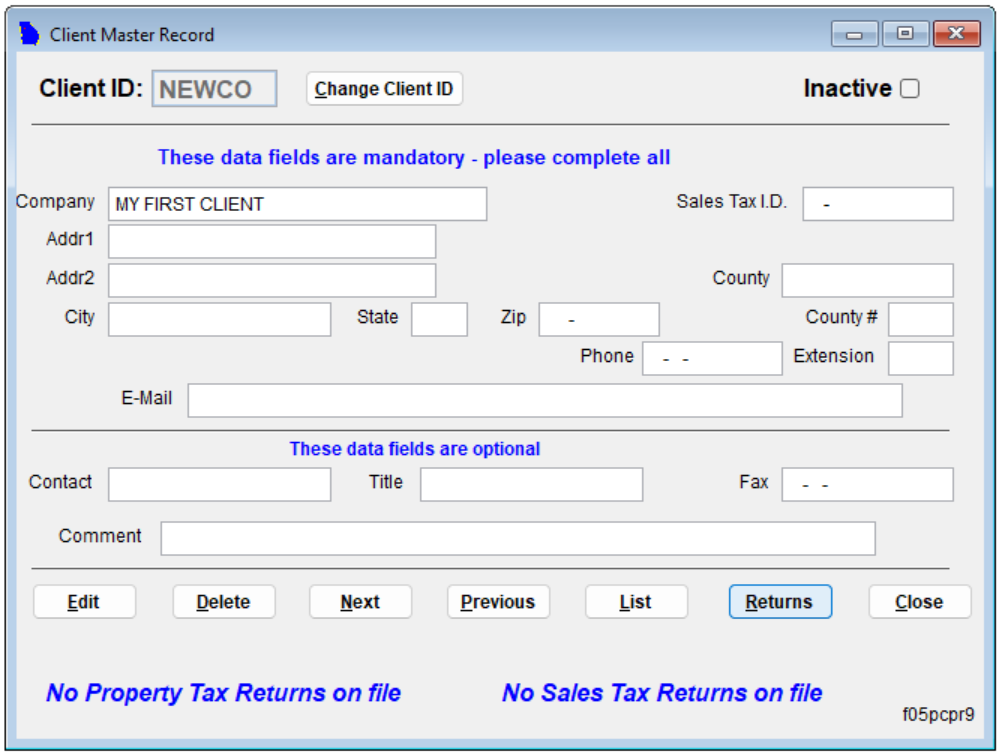
Step 3: Fill in the basic client details on the next page. This includes information such as the client's name, address, and contact information. Once you have completed this form, click on the "Returns" button to proceed.
Important: Make sure to click on "Returns" when you are done filling in the client details. Do not click on "Close" at this point.
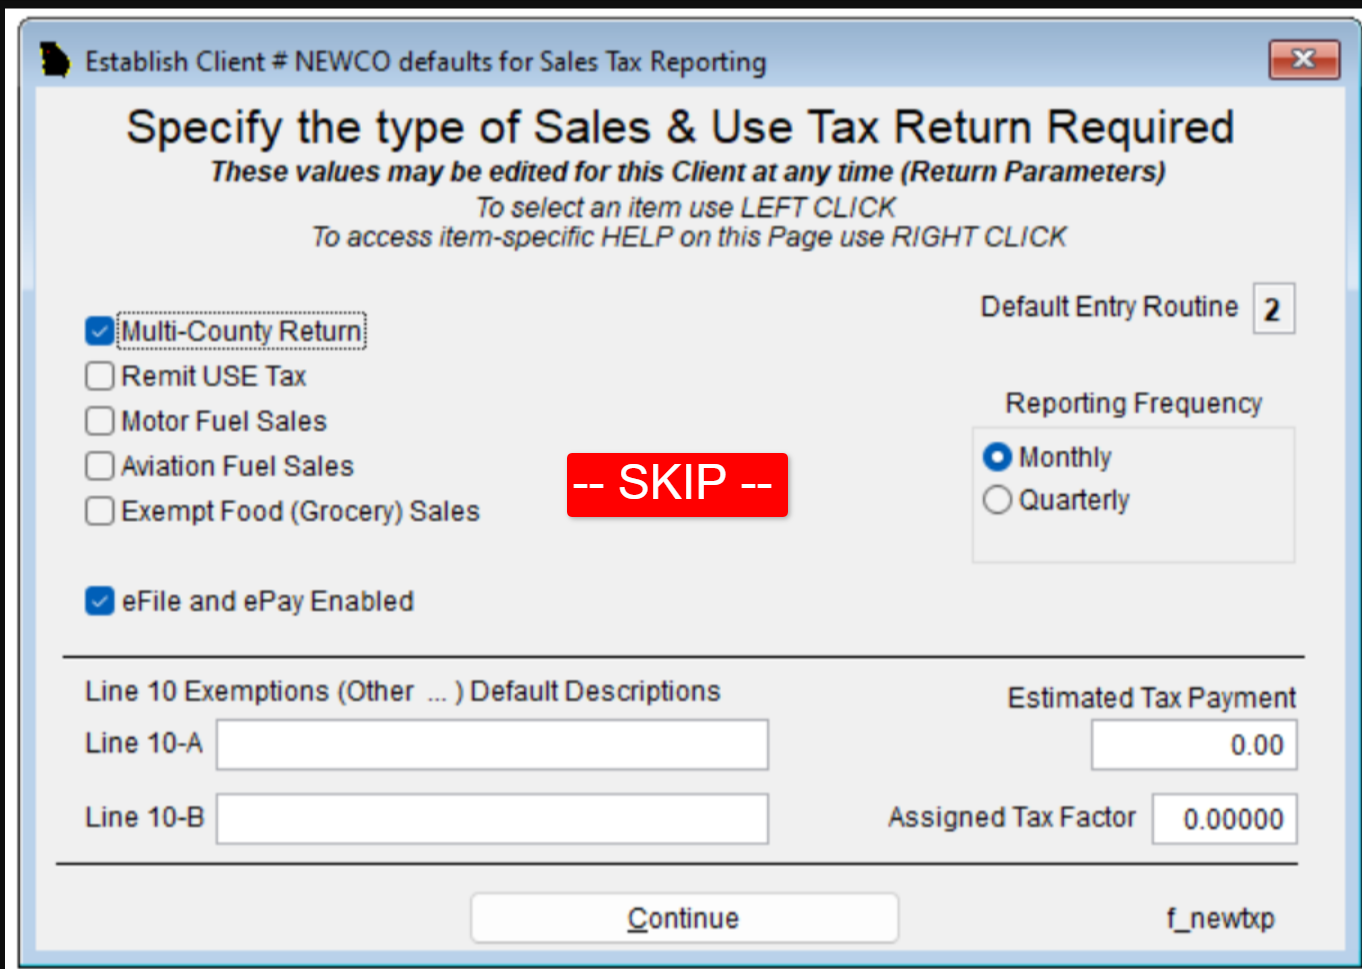
Step 4: On the following page, you can skip the detailed information for now. We will guide you through a more comprehensive setup in the next section. Simply click on "Continue" to move forward.
You have now successfully added a new client to your GA-Taxpro software. In the next section, we will walk you through the process of setting up your client's details for optimal use of the software.


