Lesson 3: Adding a Personal Property Tax Return for a New Client
In this tutorial, we will guide you through the process of adding a Personal Property Tax Return for a new client in GA-TaxPro. If you are working with an existing client who has past returns, please refer to "Lesson 4: Roll Over Return for an Existing Client" article.
Step 1: Select the client
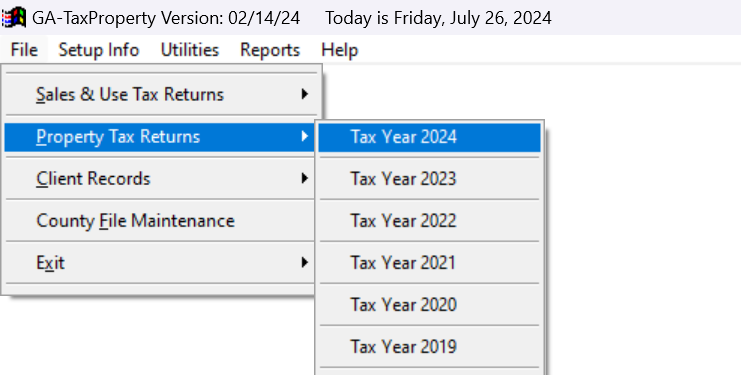
Go to File > Property Tax Return > Tax Year 2024 (select the current tax year).
From the client list, select the client you want to work on.
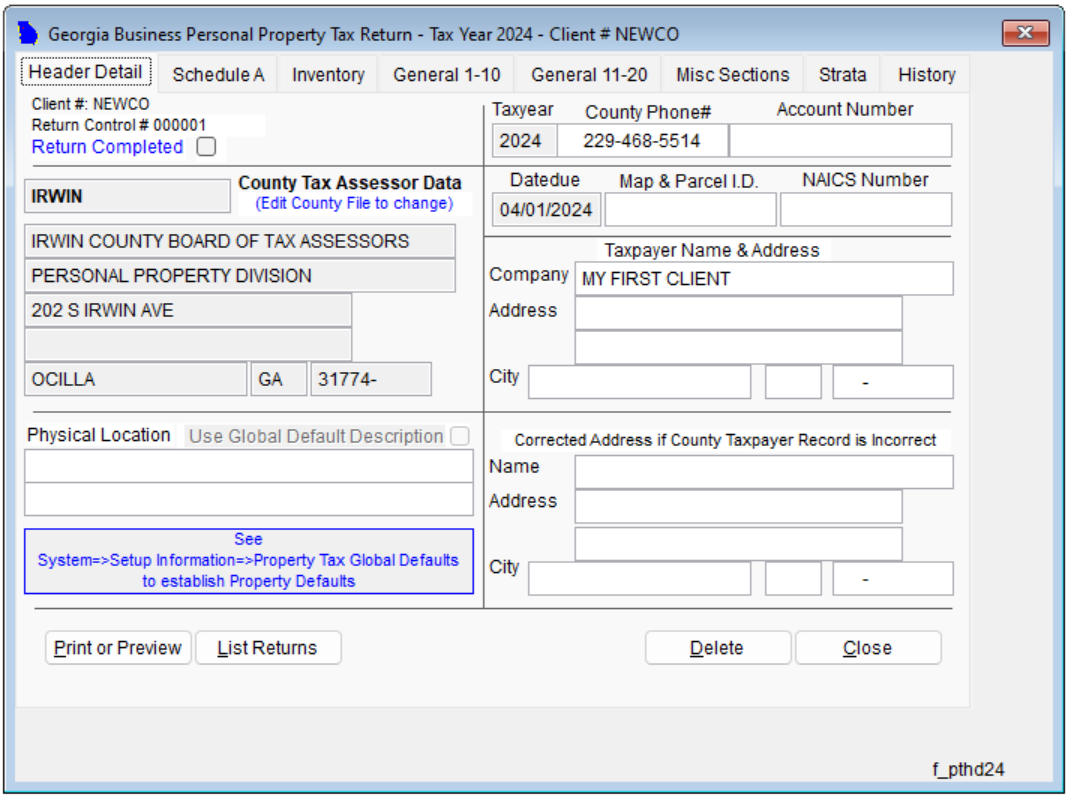
Step 2: Complete the Header Detail Tab
Review and update the header details, such as the taxpayer's name, address, and contact information.
Ensure that all the information is accurate and up-to-date.
Step 3: Complete the Schedule A Tab
Assuming you have your client's PT-50 for the last year, enter last year's Schedule A into the corresponding Group 1-4 in this tab.
Important: Do NOT enter this year's figures in this tab, as we will do this in the Misc Section.
Step 4: Add new items in the Misc Sections Tab
Click on "Additions or Items Transferred In which have not been previously reported".
In this form, add all item additions or transfers that were NOT included in last year's filing. Typically, this would be all item additions for the current year.
New items can be added using <ctrl>+N.
Once you are done adding all items, close this form. You will see an alert. Select "Yes" to transfer your item additions and disposals to Schedule A.
Review Group 1-4 latest entry to ensure the item additions and transfers are entered correctly into Schedule A.
Step 5: Complete the Inventory Tab (if applicable)
If applicable, enter the client's January 1st inventory details in this tab.
Step 6: Complete the General 1-10 Tab and General 11-20 Tab
Complete these tabs with the assistance of last year's PT-50.
Step 7: Complete additional sections in the Misc Section Tab (if applicable)
If applicable, complete:
Schedule C - Construction in Progress
Consigned Goods held but not owned by you and not reported in your inventory
Leased or Rented Equipment located at your business but not owned by you
Step 8: Complete the Strata Tab (if applicable)
Step 9: Review the History Tab
The right column "Report Files" allows you to preview or print the various item schedules in the filing.
The left column "Working Files" allows you to view and edit the full list of item schedules over all years (not just the current year). This item schedule provides more control and detailed granularity and is recommended for more advanced users.
Step 10: Double-check and finalize the return
Carefully review all the information entered in each tab to ensure accuracy and completeness.
Once you have verified the accuracy of the information, you are ready to print and mail out the PT-50 return.
Next: